Last Updated on January 13, 2019
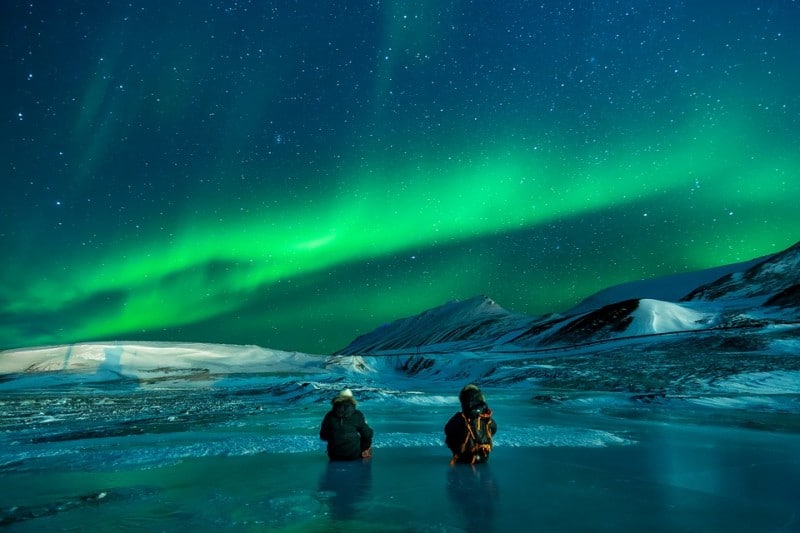
There is no better word to describe seeing the Northern Lights – or Aurora Borealis – than “magical.” Who wouldn’t be amazed at the mixture of greens and yellows and even some reds, blues, and violets in the sky? As great as they are to witness, you’d also want to preserve a memory of that stunning sight. How can that be done?
 Northern Lights: The Basics
Learning the basic details about the Northern Lights can help you plan better and take good photographs. The lights are basically discharged particles from the sun that enters the magnetic field of the earth then creates light when it mixes with atoms and molecules in the earth’s atmosphere. Particles that collide with oxygen produce green and yellow lights while those that come into contact with nitrogen create red, blue, and violet light. The shape of the lights can be either static or dynamic; strong solar flares produce the latter while minimal flares create the former.
As its name suggests, the lights can only be witnessed in the Northern Hemisphere. Iceland may be the most popular destination, but other countries in the north such as Alaska, Canada, Finland, Norway, and Sweden are also good spots to see the lights. Your chances of seeing the Northern Lights increase during the winter months, which is a period where light pollution is low and atmospheric conditions are clear. The ideal location is in places between 68 to 74 degrees latitude in the Arctic Circle.
Time is clearly an issue when trying to photograph the lights. It is a fact that you can leave a location without ever seeing them. But the good news is that there are tools that can increase your chances of witnessing the lights. Here are some of them:
- Blue Marble Light Pollution Map. Dark skies are essential in capturing the aurora. This tool will help you find dark locations around the world.
- MeteoStar Weather Satellite Imagery Maps of the Northern Hemisphere. Minimal clouds are ideal for getting quality images of the lights. This resource provides information on cloud conditions.
- Space Weather Live OVATION Auroral Forecast. Check on the KP-Index (0 indicates low chances while 9 means a very high chance) on the day you are going to shoot to increase chances of seeing and capturing the lights.
Essential Gear for Capturing the Northern Lights
Smartphones CAN capture the aurora but the quality won’t be that good. You will need the following at the very least:
- Tripod – it has to be sturdy (it can get windy) and preferably quite tall.
- Camera with Manual mode – this is so you can adjust aperture, exposure, and ISO. A preferable camera would be a full-frame DSLR.
Other recommended gear includes:
- Wide-angle lens – preferably one with an f/2.8 aperture.
- Lots of fully charged batteries – you don’t know how long you will be out in the cold, and chilly conditions result in shorter battery life. Take more than five with you if you could and put them in your pocket as the heat from your body helps lengthen their life.
- Shutter release cable – to avoid camera shake and ensure clear photos.
Camera Settings for Photographing the Northern Lights
There is no fixed setting for taking photos of the aurora but there are ideal settings. From there, you can tweak them as you see fit. Here they are:
- RAW image format – this allows you to make changes in post-production.
- Aperture – start at f/2.8 and see how things go.
- Exposure – a good benchmark is between 5 to 25 seconds but the actual time will depend on how quickly the lights are moving. Slow movement means you can set exposure between 10-25 seconds while a fast movement requires a setting of between five to seven seconds. You will do a lot of experimentation and adjustment with this one.
- ISO – keep in mind that you are shooting at night so you need to kick up the ISO levels. You can start with ISO 400 to 800 to see how things go then slowly increase from there if your images aren’t turning out bright enough. This is where having a full-frame camera does wonders: you can pick really high ISO levels without the resulting photos having too much noise.
It’s also good to keep in mind the basics: adjust aperture and exposure time first before attempting to increase the ISO – higher ISO levels mean more noise.
The Northern Lights are elusive and you should prepare yourself for disappointment. However, the tools provided here along with the photography tips can increase your chances of seeing the lights and preserving that memory in a photograph.
 Northern Lights: The Basics

